Showing posts with label Revlon. Show all posts

Friday, January 27, 2012

Tag: Nail Polish Obsession

Alrighty friends, so I just got a couple of new polishes yesterday that I loooove and leu of a few newbies joining my collection I thought I'd show my nail polish collection! So, let's get started:

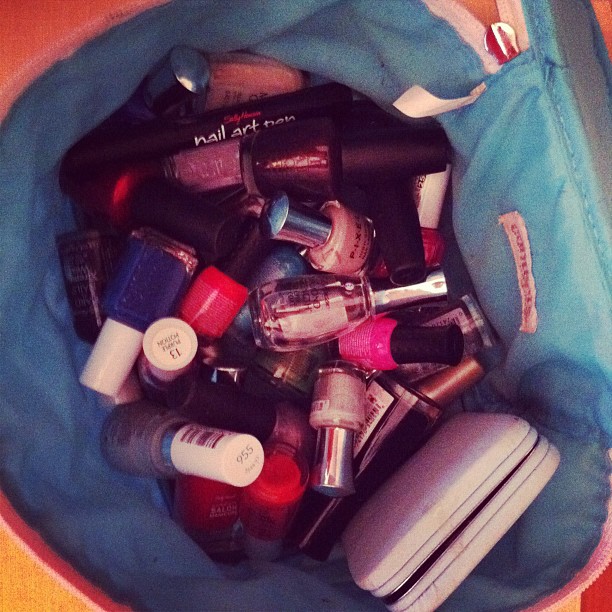
^ Here's everybody! {Bag: Target 'Contents' brand case, ~$16. Mini-manicure/nail grooming kit: B&BB, no longer sold.}

Alrighty, so I figured to be thorough I'd break-down by color family(?)

THE ESSENTIALS:
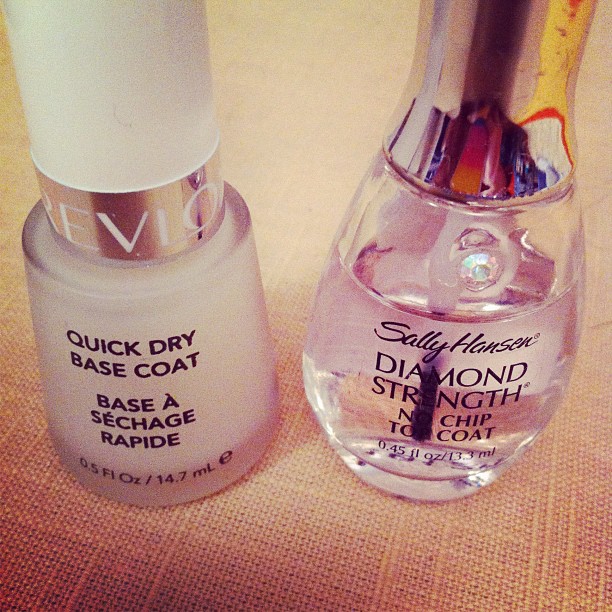
*Recap: I swear by each of these products, thus why I've re-purchased time and time again!

NUDES & PASTELS:
*Recap: the essie polish is definitely a favie & I always get compliments when I wear it, the Pixel polish formula's take two coats but that's pretty normal, and the SH growth polish is perfect for toes! and for when your nails just need a break from pigmented polish.

TWINKLERS:
*Recap: I loooove the Nicole by OPI polish, it's definitely a 'most worn' polish for me (see!). The pink glitter Milani polish is also super fun – but, you have to know going in that it's h-e-double hockey sticks to get off! The Garnet Gems is a miss for me, I wish the glitter were set in a clear polish instead of a smokey clear.

THE PINK LADIES:
*Recap: the OPI polish is the quintessential 'holiday' polish, that's always when I bust it out. The SH All Fired Up is hands-down my absolute fav polish color of every polish I own. Love Orly polishes – excellent formula, same with essie polishes. The Bach. Bash is the best summer color.

BLACKS & ALMOST BLACKS:

*Recap: Love the SH Insta-dry formula for darker colors especially, and this black is really slick looking. Hi-shine. The L'Oreal color is pure awful unless paired with Garnet Gems glitter (like this) – that's the only exception, and the only reason it's still in my bag! The Nicole polish is okay... kind of a fall/winter color for me. (*Def. better with a coat of essie Nice Is Nice as a base.) I loooooove In the Navy! Again, one of my 'most-worn'. And finally the nail art pen – loooove it for black tips. Easy to use.

THE BLUES:
*Recap: essie's Mezmerised is another 'most-worn' for me – the pigment and formula of this polish just make me happy :) The Pixel polish is one of my new ones and I haven't tried it yet so we shall see! Both the SH Marine Scene & Purple Potion are misses for me. They are only fun when you have like 3 hours to paint your nails, as they require multiple coats and the formula is not rapid-drying whatsoever. However, both colors do cool things when applied as a thin topcoat.

– • o O o • –

And wrapping up with the zeroes and the heroes – polishes that are a total miss & total successes:

Let's begin with the zeroes so to have a happy ending to this post ;)

*Recap: I've already talked about my displeasures with Stroke of Midnight, Garnet Gems, Purple Potion, and Marine Scene. The OPI polish is just an almost-black brown color and isn't flattering on me – however, I can see it being a flattering polish on someone with tanned or dark skin. As far as the green polish – it's awful. It's not kelly green like it appears, the formula is thin and if you care to read more on my disappointment with this polish read this.

The heroes! Yaaay!
  • OPI An Affair in Red Square
  • essie Nice Is Nice
  • Orly Terra Cotta
  • essie Mezmerised
  • Pixel Thigh High
  • Nicole by OPI Light A Candle
  • essie Bachelorette Bash
  • Sally Hansen Complete Salon Manicure All Fired Up (550)

Saturday, December 3, 2011

Target: (Very) Mini-Haul


Went to Target today to pick up a couple of things, mostly product minis as I'll be traveling to Tampa, FL for work in a week-ish. But, of course – I can never leave Target without picking up at least 3 things I don't need and I didn't come in for :) So, here's a very mini-haul of some products I picked up to try:

Left: baby washcloths, $4.99 (for 6) – I'm (way) old school and still wash my face with a traditional wash cloth, so in leu of trying to be better to my skin I purchased a pack of cloths gentle enough for a baby. Hoping this route will be less abrasive.

Middle: Revlon ColorStay Lip Butter in Candy Apple, $6.39 – I put this on right when I got home, as I'm always skeptic of red shades; they are often too pink/violet for me. I love this lip butter!! It's the perfect orangey-red for yellow'er skin tones, and it's oh so soft on the lips. Unfortunately, it was one of only 4 colors they had left and I really wanted to get Peach Parfait, Creme Brule and Strawberry Shortcake. Maybe next time.

Right: TRESemme FreshStart Dry Shampoo (For oily/strait to normal hair), $5.29 – So, I'm on a mission to be nicer to my hair. I know you're not supposed to wash and blow-dry your hair every day… but I do, and it's just not a fun time. Chicago city water is super hard and leaves my 2nd-day hair flat, oily and overall disgusting (thus, why I feel the need to wash it every day). I've never used dry shampoo before, so I figured I'd ease in with a less pricey product and see how it goes. I will say I'm attracted to the aerosol application however. Stay tuned for my thoughts.

Sunday, November 13, 2011

(Weekly) Nail Polish Re-Paint


This one was a multi-layered process for sure– definitely not 'simple'.
  1. Revlon Quick Dry Base Coat (955)
  2. One light coat of Essie Bachelorette Bash – I put this down as a base so to pull the next color in a more crimson/cranberry direction because the Stroke of Midnight polish is basically black when applied by itself.
  3. One coat of L'Oreal Paris Stroke of Midnight – Brush on enough to not be streaky, but not too much to where it's too dense.
  4. Wait until both coats are fully dry – Seriously, like an hour-ish.
  5. One light coat of Milani Garnet Jems (27A) – Because the Milani polish has a very liquidy base, I opted out of a top coat polish
  6. If I end up adding a top coat, I'll use Sally Hanson Diamond Strength No Chip Top Coat


Thursday, November 10, 2011

By Popular Demand: Full (Everyday) Makeup Routine

First, I'll kickoff by saying my facial cleansing routine is not included here. Obviously, begin any makeup application to a clean face :)

Face & Foundation:

  • Step 1: Apply Clinique Dramatically Different Moisturizing Gel to face and neck. (*Depending on what the outcome of your skin evaluation is via Clinique.com - "Find Your Routine", the DD Lotion product might be recommended for you vs. the Gel).
  • Step 2: Apply Garnier Skin Renew Anti-Dark-Circle Roller to under eye area and gently blend in with index finger.
  • Step 3: Squirt about a 1/4 of a dime-sized dot of Make Up For Ever Mat Velvet + liquid foundation onto the back of your hand, then take index finger and dot your face– try to keep most of the product away from the edges of your face so to avoid awkward lines.
  • Step 4: Rinse the Beauty Blender under warmish water and squeeze out until its expanded and is damp, not soaked. Gently work the foundation into your face by stippling the Beauty Blender around. *Use the tipped end to blend areas like the inner eye and nose creases.
  • Step 5: Apply Covergirl Smoothers Concealer stick (in 'Neutralizer') to areas of redness or blemishes that need further attention. Again, blend the concealer in with the Beauty Blender.
  • Step 6: Finish off by setting your foundation with a light amount of Maybelline Dream Matte Powder, using a kabuki-style brush.


Facial Accents:

  • Step 1: Contour your cheek area, upper corners of the forehead and a light swipe on the bridge of the nose with a bronzer. *I prefer a product with no shimmer, so I use BareMinerals All-Over Face Color in 'Warmth' and apply with a smaller contour brush.
  • Step 2: Add some pink to the apples of your cheeks with Revlon ColorStay Mineral Blush in 'Petal' (020), using an angled brush.
  • Step 3: Then, for just a teensy bit of highlight, I lightly dip my same angled brush into the Urban Decay Naked Palette colors 'Virgin' and 'Sin' and apply on the uppers of my cheek bones.
  • Step 4: I give my brows a quick comb with a mascara sample wand.
  • Step 5: And finally, to fill in the brows first run a thin tapered brush or liner brush in a light amount of water, just to dampen it– we're not water coloring here. Then, with the damp brush pick up a swipe or two of the 'Buck' color in the UD Naked Palette and fill. Use water and shadow as needed.


Simple Eyes Routine:

  • Step 1: Prime your lids with a light amount of Urban Decay Eyeshadow Primer Potion.
  • Step 2: Using a brush apply Maybelline Matte Expert Eyewear Shadow in 'Campagne Fizz' (30) to entire lid up to but not through the crease.
  • Step 3: Using a crease brush apply a light swipe of the color 'Naked' from the UD Naked Palette.
  • Step 4: Using Maybelline Line Stiletto Ultimate Precision Liquid Eyeliner in 'Blackest Black' line your entire upper lid, giving the outer lid a slightly thicker line than the inner. Then, 'dot' about 4 dots on the lower lash line and smudge with a liner brush– connecting the 'V' of the outer eye. (*For an additional visual element, you could wet your tapered or liner brush and pick up a small amount of the 'Gunmetal' color from the UD Naked Palette and run that along the outer lower lash line).
  • Step 5: Curl your lashes.
  • Step 6: Apply mascara. I prefer a thick (but not clumpy) look on the upper and very minimal on the lower, so I first apply Revlon Grow Luscious by Fabulash in 'Black/Noir' for volume, and then a second coat to separate using Maybelline Colossal Volum Express in 'Classic Black'. I also use the Maybelline mascara for my lower lashes.


The Final Touch – Lips:


And there you have it– a full start to finish, relatively simple makeup routine! I know it seems like there's a ton here, but I have to tip my hat to the Urban Decay Naked Palette. We created a highlight, brow fill, shadow AND liner looks all using one product!!

What about you all out there? What your routine? Any favorite product raves? Things you can't live without? I'd love to hear!